The standard 110v power socket found in most homes work well with small appliances and welders. If you want to run a power-hungry appliance such as a large welder, you need a 220 v power plug.
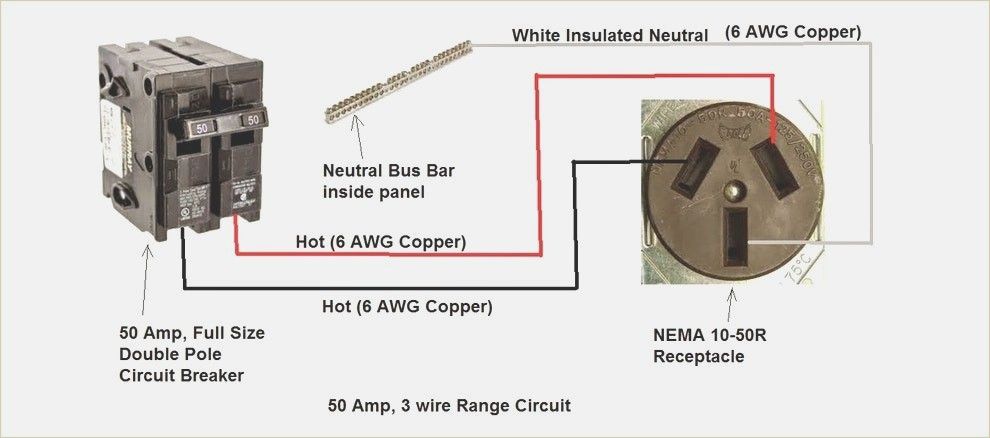
This means you will need to know how to wire a 220v plug with 3 wires. Typically, a 220v power plug can be connected with three or four wires. These are two hot wires, one neutral and a ground wire.
The two hot wires are usually black and red in color. On the other hand, the neutral wire is usually white in color and the ground wire green. You can opt to connect three wires to the plug, which are the two hots and the neutral.
So how do you do this?
Four Steps Of Wiring 220v plug with 3 wires
For the best 220v plug click here.
Step One: Choose A Wire Gauge
The first thing to do is to know what gauge of wire to use. Gauge refers to the thickness of a wire. The lower the gauge, the thicker the wire. For a 220 volt plug, you can use either a 10 gauge or an 8 gauge.
The thinner 12 gauge wire will be more suited to the less powerful 110-volt power plug.
Required amperage and wire gauge for your circuit
| Amperage | Wire gauge |
| 220v, 20-amp | 12-gauge |
| 220v, 30-amp | 10-gauge |
| 220v, 40-amp | 8-gauge |
| 220v, 50-amp | 6-gauge |
Step Two: Remove The Outer Coating Of The Wire
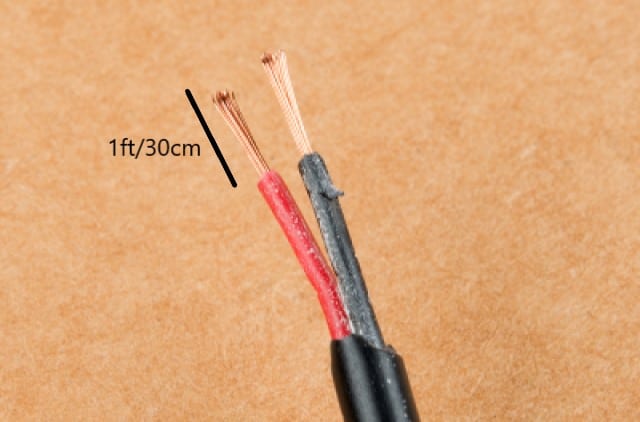
The next thing you need to do is to remove the outer coating of the wires. Remove at least 1ft or 30cm of the coating using a wire stripper. If you do not have a wire stripper, you can cut the coating using a utility knife. This will expose the wire inside the cable.
Step Three: Feed The White Wire
Turn the power plug around and look for the screw labeled “white” or “neutral.” Push the white wire into the port under the screw. Next, use a screwdriver to tighten the screw and secure the wire.
Step Four: Push The Hot Wires

There should be two unlabeled screws on either side of the “neutral” one. These are the two hot ports where the black and red wires need to go. There is no specific order, and you can slot the wires in either port.
Like the neutral wire, use a screwdriver to tighten the screws to ensure the wires do not fall off.
Wiring a 220V Plug: Useful Tips for Every Homeowner
Homes are getting more and more high-tech by the day. From heating systems to smoke detectors, it seems like there’s a device for every job these days. One of the most common household devices is still the plug. To make sure that you’re using your home appliances safely, here are some useful tips on wiring a 220v plug:
1) Make sure that all your wires are properly insulated with electrical tape or another suitable material. This will prevent any shocks from occurring while you work with them
2) Check which wire goes where – red usually means hot, black is neutral and white is ground
3) Attach both ends of each wire to each other in order to create an electric circuit, using the screwdriver
4) If your plug doesn’t work, it may be because of a loose wire connection. Check each one and tighten if necessary!
5) when wiring a 220v plug, it’s important to make sure the hot and neutral wires are not in contact with each other. If they do touch then you’ll need to use a suitable insulator or a plastic pipe
Final Word
This article will teach you how to properly wire 220-volt plugs for both 115 volts and 230 volts systems. Knowing what all those wires are attached to is an important first step in this process. There should always be three different colored wires coming from the outlet going into your device with red being hot, black being neutral, and white being ground – however not every color is universal so check before working on any connections with these colors as they might be used differently elsewhere in the world. Electrical tape can provide insulation during wiring which prevents shocks or other accidents while doing this task.