To wire a toggle switch with 4 prongs, start by identifying the neutral/negative terminals. When you’ve done that, grab wires and use a wire connector to link the positive terminal of the battery and the positive terminal of the device. Likewise, for the two negative terminals, attach two wires to the prongs. One prong goes to the battery’s negative terminal, and the other to your device’s negative terminal.
To know the whole process of how to wire a toggle switch with 4 prongs keep on reading.
How Does A 4-Prong Toggle Switch Works?
Before you start wiring one of these four-prong toggle switches, you must know how these work. If you know how a two-prong toggle switch works, you should have some idea but if not, no worries.
Obviously, a four-prong toggle switch has four prongs, two of which are for powering a device and the other two are for the LED light that’s inside the switch.
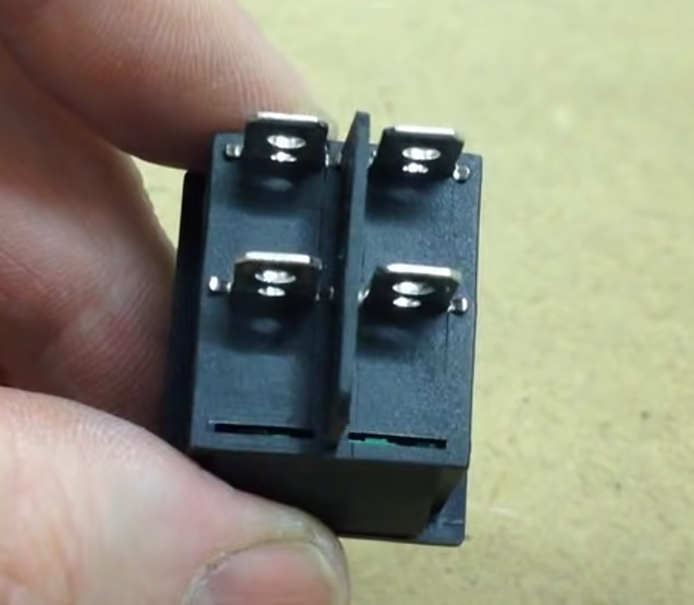
Usually, the terminals are paired vertically, the right side is the load side, and the left side is for the LED.
One prong from the load side will be connected to the device and the other will be connected to the battery to complete the circuit.
On a similar note, one prong from the LED side will be connected to the device’s negative, and the other prong will be connected to the battery’s negative.
This way, when you turn the switch on, it will complete the circuit to power the device, and the internal LED light will be turned on.
How To Wire A Toggle Switch With 4 Prongs
Tools Needed
- 4-prong toggle switch
- Wires
- Multimeter
- Wire connector
- Fuse (optional)
The Procedure Of Wiring 4 Prongs Toggle Switch
- You can find your neutral/negative terminals by turning off the switch and examining two terminals with continuity.
- When the switch is on, check the continuity between the other two terminals. If there is continuity now, but not before, then these are your positive/line terminals.
- Now get some wires and connect one of the positive terminals to the battery and the other to the device. For a better connection use a wire connector.
- For safety purposes, you can also connect a fuse. Connect the fuse to the wire that goes from the switch to the battery.
- Similarly, connect two wires on the prongs from the LED side.
- Connect one prong to the negative terminal of the battery and the other to the negative terminal of the device.
Now that you have followed all the steps, the connection should look something like this-
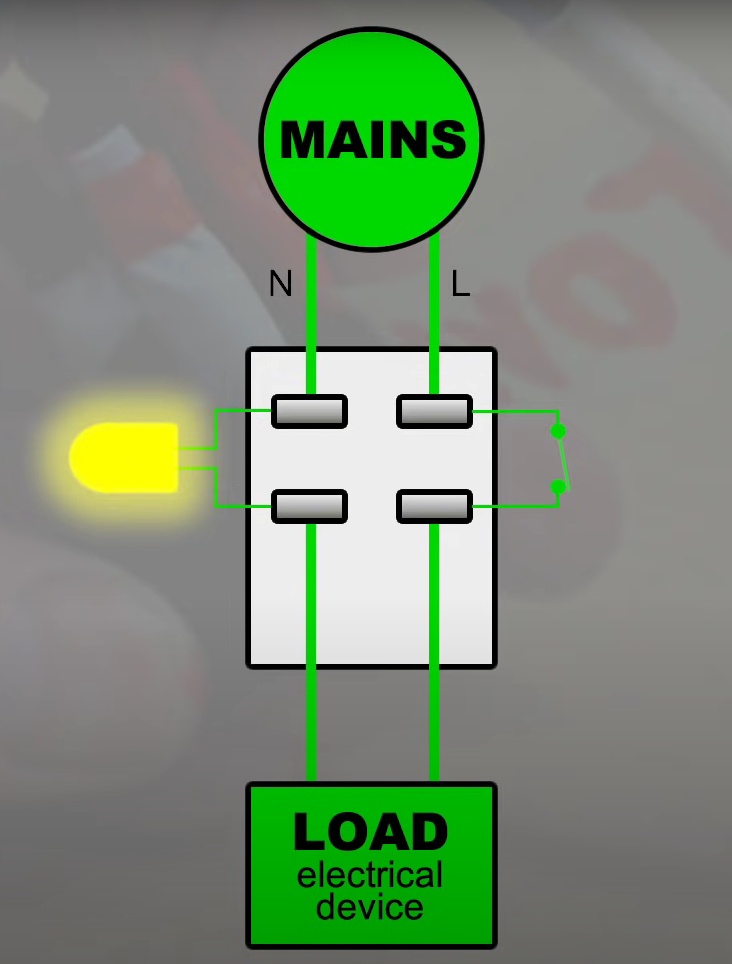
Test the connection by turning the switch on and off to see if it works.
Here is a article of wiring 3 way toggle switch for you.
Tips For Wiring a Toggle Switch With 4 Prongs
Wiring a 4-prong toggle switch is pretty straightforward, but here are some useful tricks to streamline the process:
- Safety First: Always turn off circuit power before working on wiring. Safety matters, and following your home’s power-off protocol is crucial.
- Know How It Works: Get a handle on how the switch functions before diving in. It’ll make your work smoother.
- Wrap Right: If it’s a light switch, loop the wire around the terminal screws in a clockwise direction. This helps keep the connection solid when you tighten the screw.
- Draw It Out: Sketch a wiring diagram of the circuit. It’s like a roadmap that guides your connections.
- Colors Matter: Keep things neat with color coding. Typically, red is for positive, and black is for negative.
With these smart moves, you’ll breeze through the switch wiring task like a pro!
Conclusion
In summary, knowing how to wire a toggle switch with 4 prongs can be very useful in many situations. Moreover, the best part about it is that it is a very simple process. Even so, if you’re not sure what to do, get some assistance.