Replacing a damaged plastic part with a new one can be costly. Thankfully, it is possible to weld plastic with a soldering iron. Welding plastic is not restricted to repairing damaged parts, though. You can also use a soldering iron to weld plastic for fabrication or artistic purposes.
So how is plastic welding with a soldering iron done? This is the question we will be answering in this article.
How to weld plastic with a soldering iron
Step one: Degreasing the plastic
This step is not a must and will depend on the kind of plastic you are welding. If the plastic has grease, then you will want first to get rid of it. This can be done with rubbing alcohol. However, if the part is not greasy, then this is not necessary.
It may also be necessary to sand the plastic edges to be welded so that they are not jagged.
Step two:Turn on the soldering iron.
Next, plug in the soldering iron and turn it on. Let it heat up for a few minutes before using it on the plastic. You can set the temperature of the soldering iron depending on the thickness of the plastic.
Step three: Run the soldering iron tip.
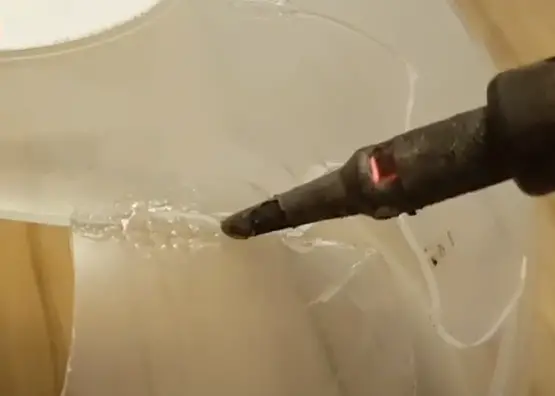
If you are welding two plastic pieces, push them together. Then run the tip of the soldering iron along the seam in a back and forth motion. This is to melt the plastic partially. You will need to adjust the pieces to ensure they are correctly aligned as you melt the plastic.
Step 4: Add more plastic or wire.
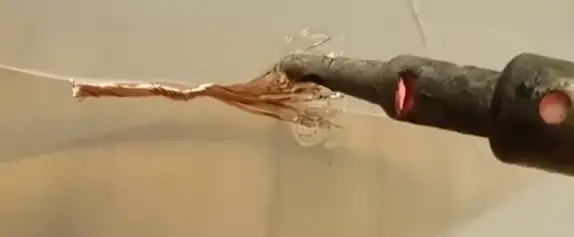
To strengthen the bond, you will need to add either more plastic or wire. A wire will be a good choice as it absorbs heat faster. Place it along the seam and melt the plastic around it to cover it.
When using additional plastic pieces, place them along the seam and melt them with the soldering iron tip. Ensure they are melted and become part of the weld.
Step 5: Finishing touches
Using the soldering iron tip go over the seam and its surrounding areas. Use fast and smooth strokes for an even and smooth weld surface.
Plastic welding tips
As with any other type of welding, there are several tactics you can use for better results. Here are some useful tips on how to weld plastic.
- Clean the plastic first
Before welding a plastic surface, ensure there are no oils, paints, or greases. When working with large parts, such as bumper bars washing them first is always a good idea. This is to ensure you remove any dirt or mud on the surface. Flux can be effectively used for cleaning.
- Heat the plastic first.
When working with thicker plastic, it may take some time to melt the area around the crack. Pre-heating the plastic before welding will help facilitate melting. Also, heating will prevent the plastic from being welded from cooling too fast. You can use a heat gun to first heat the plastic before welding.
- Hotter iron is better.
The idea behind welding plastic is to melt it and fuse the liquified solution and allow it to cool, making it fuse. To do this, you need a hot soldering iron—ideally, the hotter, the better. However, when the iron is too hot, it may burn through the plastic.
To prevent this, move the iron along quickly. But you may need to move it slower if the plastic is thick and can accommodate the heat.
Conclusion
Plastic is an incredibly malleable material. This is why it can be welded. Welding plastic parts together may not yield the most aesthetically pleasing result, though. This is something to keep in mind. However, the finished weld, when done correctly will look good enough for most applications.
